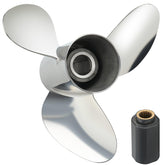
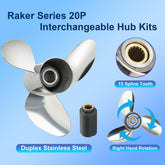
Spun Hub, Bent Blade, or Lower-Unit Damage? How to Diagnose and Fix Common Prop Problems
Props take a beating. Rocks, lines, weeds, shallow water and everyday wear all show up as vibration, loss of thrust, odd steering, or engine-hours that don’t make sense. The tricky part is diagnosing which part failed: a spun hub, bent blade, cracked hub, or something worse in the lower unit (gearcase, shaft, bearings). Get the diagnosis wrong and you waste time and money — or worse, keep running and make the damage much more expensive.
This guide walks you, step-by-step, through practical, North-America-focused diagnostics and fixes that a competent DIYer or weekend boater can use, plus clear decision criteria for when to stop and call a pro. I’ll also show cost ranges, safety tips, tools you’ll actually need, and how a modern, factory-direct supplier (like VIF Marine) fits into the replacement/repair workflow so you can get back on the water fast without paying unnecessary OEM premiums. For background on how props are made and why tolerances matter, see this manufacturing primer: https://vifmarine.com/how-boat-propellers-are-manufactured/
Read this first — the quick triage checklist (do this before you panic)
-
If you hit something hard, stop immediately and put the engine in neutral.
-
Check for obvious damage from the swim platform or knee — bent blade tip, hub wobble, oil leaks.
-
Run the boat slowly (in water) and see whether vibration or loss of thrust is present. Note RPM, GPS speed and odd noises.
-
Take a photo of the prop and lower unit BEFORE you start removing parts — useful for a shop estimate and warranty claims.
-
If you see oil in the propeller hub cavity or lower unit oil leaking — do not run the engine. That suggests internal damage and water ingression risk.
Triage quickly, document, then proceed with the stepwise checks below.
The symptoms and what they most likely mean
A quick translation guide — matching the symptom you see to the most likely cause.
-
Engine revs but boat doesn’t move / huge loss of thrust → classic spun hub or stripped splines.
-
Sudden vibration at cruising RPM → likely bent blade (most common), blade nicking, or imbalance.
-
Grinding noise, metal shavings in lower unit oil, or oil leak → potentially lower-unit gear or bearing failure (serious).
-
Prop wiggles on the shaft or has axial play → worn splines, loose nut/washer, or damaged thrust face.
-
Engine overheats or cavitates at mid-throttle → prop damage (cupping) or ventilation from trim/installation, possibly hub slip.
-
Loss of top speed but normal RPM → partial blade deformation or changed blade geometry (cupping worn off) or fouling.
-
Oil milky / cloudy or water in oil → water ingress from a damaged seals or cracked lower unit — stop immediately.
Knowing these symptom→cause links will save you a lot of time and be invaluable when talking to a tech.
Tools and supplies you’ll need for diagnosis (basic kit)
-
Digital camera or phone (document everything).
-
Torque wrench and prop nut socket specific to your engine (Mercury / Yamaha sizes differ).
-
Replacement cotter pins, stainless prop nuts, thrust washers.
-
Basic hand tools: sockets, pliers, screwdrivers, rubber mallet.
-
Dial indicator or small straightedge (for checking blade alignment).
-
Flashlight and mirror.
-
Container for catching lower unit oil and drip pan.
-
Absorbent pads and rags.
-
Replacement hub kit (Flo-Torq® types for Merc or OEM hubs, if you have them), or order a replacement prop if hub integral.
-
Optional: vise with soft jaws for bench checks; prop puller if corroded on.
Safety: always chock the boat, remove key when working around prop, and follow engine manufacturer safety procedures.
Step-by-step diagnostic workflow (do this in order)
1) Ground inspection — what to look for visually
-
Look for nicks, gouges, or obvious blade bending. Rotate the prop by hand and look for rubbing against the skeg.
-
Inspect the hub for visible looseness. Try to wiggle the prop side-to-side (axial play) and feel for slop. A little axial play is normal on some units but not a lot.
-
Check the shear pin (if present) and cotter pin; missing hardware can cause free movement.
-
Smell the hub and lower unit oil — a burnt metallic smell and metal flakes are a red flag.
Take pictures and log mileage/hours and the event (hit a log at X mph, or noticed vibration after docking, etc.). That note is gold when you talk to a mechanic or file a warranty claim.
2) Water test (if safe) — confirm the symptom
If you can, run the boat at idle in calm, shallow water (no hazards) and check for unusual yaw, loss of thrust, or grinding. If you see water in oil or hear grinding, shut down and move to onshore inspection.
3) Remove the prop — hub inspection
-
Put engine in neutral, remove cotter pin and prop nut, and slide the prop off the shaft.
-
Inspect inside the hub: is the rubber spider intact? Are there chunks missing? Is the prop hub compressed or melted?
-
If the hub rubber is shredded, you have a spun hub or failed shear hub. If the rubber is intact but there is slack between prop and shaft, splines may be worn.
If replacement of the hub is possible (many props use replaceable rubber inserts or Flo-Torq style hubs), you can often repair the prop yourself by fitting a new insert. If the hub type is integral or splines are stripped, replacement is needed.
4) Inspect the shaft and splines
-
With the prop off, inspect splines on the shaft for wear, flattening, or rounded edges. If splines are damaged, the prop will not fully engage and will slip under load.
-
Check the shaft for straightness (roll it on a flat bench if you have one). A bent shaft will cause vibration and points toward lower-unit or shaft damage. Shaft straightening needs a pro.
5) Check lower unit oil
-
Remove drain/fill plug, drain oil into clear container. Look for metal shavings, milky oil (water), or excess metal particles.
-
Magnet (if you have one) can help detect ferrous shavings. A little fine metallic residue is common. Big chunks or lots of metal = gear/bearing failure.
If oil is contaminated, do not run the engine. That’s a serious failure that requires shop attention.
6) Blade straightness & balance test
-
Clamp the prop in soft jaws; use a dial indicator or straightedge to check each blade tip runout relative to hub face.
-
Small blade variations can be tuned out by careful straightening on aluminum props. Stainless is much harder to reprofile accurately; small bends often require a shop press or replacement.
A prop shop will dynamically balance the prop after any straightening to avoid reintroducing vibration.
Spun hub: detailed signs and repair
What is a spun hub?
Most modern outboard props have a rubber-type hub or elastomeric insert that transmits engine torque while providing a sacrificial shear point. When that rubber deteriorates or the hub shears on severe impact, the prop may spin on the hub or the hub inside the prop slips on the shaft — you get throttle but no thrust.
Signs
-
Engine RPM rises but boat does not accelerate (or accelerates poorly).
-
Loss of top speed and inability to plane.
-
Prop can be rotated on the shaft by hand with minimal resistance (after removing nut).
-
The rubber spider is collapsed, missing chunks, or looks melted.
Quick DIY fix (if replaceable hub)
-
Remove prop and inspect hub. If the hub is a replaceable insert (Flo-Torq style or similar), purchase the correct hub kit for your prop model.
-
Clean the inner hub bore of corrosion or debris.
-
Press a new rubber insert in using a vise or bench press with soft protection—follow the hub kit instructions.
-
Reinstall prop with correct thrust washer sequence and torque the prop nut to OEM spec. Always replace cotter pin or use new cotter hardware.
Cost: hub kits typically $15–$60 for common replacement elastomers; labor if you use a shop maybe $40–$120.
When you can’t DIY
-
If splines on shaft stripped or hub bore is severely distorted, the prop or shaft may need replacement or professional repair.
-
If the hub is integral and the prop cost is low relative to hub repair, replace the entire prop.
Bent blade: diagnosis and repair
How blades get bent
Strikes with rocks, submerged logs, docks or heavy debris produce bends, tips flattened or shear on leading edges. Aluminum blades usually bend; stainless blades may dent or crack.
Symptoms
-
Vibration at cruise RPM (usually starting after the impact).
-
Loss of top speed or strange handling/steering pull.
-
Visible deformation when you spin the prop.
DIY repair steps (aluminum props)
-
Remove the prop and secure it in a vise with soft jaws or wood blocks.
-
Gently bend back using a rubber mallet and wooden block or a specialized prop straightening tool. Bend small amounts and check runout after each adjustment.
-
Rebalance: after straightening, you should have the prop professionally balanced. Unbalanced props cause damage to the lower unit and vibration. Many shops will do straightening + dynamic balancing for a modest fee.
Repair costs: aluminum straightening + balance generally $30–$80 depending on shop. Stainless straightening is often more expensive and sometimes uneconomical compared to replacement.
When to replace
-
Stainless crack or multiple hits causing structural defects.
-
Blade edges are torn or have large chunks missing.
-
Prop is out of round beyond practicable straightening (dial indicator shows significant runout).
Replacement stainless props can range $200–$700+; aluminum replacements often $60–$180 depending on model and fit.
Lower-unit damage: signs, severity and next steps
What lives in the lower unit
Gearset (pinion, forward/reverse dog clutch), bearings, seals, prop shaft — all vulnerable when a prop strikes hard. Damage here is more expensive: gear replacement, bearing kits, seal replacement, and labor.
Red flags that point to lower unit damage
-
Loud grinding or whining noises from lower unit.
-
Metal flakes or chunks in lower unit oil.
-
Severe vibration that doesn’t change after prop replacement.
-
Oil leaks along the lower unit seams or into water (milky oil).
Immediate actions
-
Stop running the engine. Continued operation will compound damage.
-
Drain lower unit oil and inspect for metal. Photograph and save oil for the mechanic.
-
Tow or trailer the boat to the shop — don’t run the engine for transit.
Typical repair scope & costs (ballpark, North America)
-
Seal replacement / basic service: $150–$350 (parts + labor).
-
Bearing & gear set rebuild: $500–$1,500 depending on engine model and parts.
-
Prop shaft replacement or reconditioning: $200–$600.
-
Complete lower-unit overhaul (major damage): $1,200–$3,500+ depending on parts and labor.
Warranty note: if you recently bought a prop or lower unit, check warranty and dealer involvement — some damage caused by strikes is not warrantable, but manufacturing defects are.
When to DIY vs bring it to a pro
Do it yourself if:
-
The issue is a replaceable hub (you have the kit and correct part).
-
The prop is aluminum and has a simple bend you can correct and then have dynamically balanced.
-
You can remove/install prop without risking incorrect torque or missing thrust washer order.
Bring it to a pro if:
-
You find metal shavings or water in lower unit oil.
-
The shaft splines look damaged or bent.
-
You suspect gear or bearing damage (noise, grinding).
-
It’s a stainless prop with complex damage or cracked hub.
-
You lack tools or are unsure of torque/spec sequences — improper reassembly can irreparably damage gearbox.
Remember: labor rates and turnaround matter. A quick shop visit often prevents far costlier repairs later.
Preventive maintenance — how to reduce incidents and catch wear early
-
Inspect the prop at least once a month during the season. Look for nicks, corrosion, hub wear.
-
Grease the prop shaft spline with marine grease during removal and installation.
-
Replace cotter pins, prop nuts and thrust washers as needed. Cheap hardware replaces a big headache.
-
Flush saltwater engines after each salt outing and store in dry conditions. Corrosion increases seizure risk making prop removal harder.
-
Consider a spare prop and hub kit in your trailering kit — cuts downtime dramatically.
-
If you trailer launch a lot, consider a sacrificial aluminum prop on the lower unit and a stainless prop kept for performance days.
Choosing a replacement prop or hub — practical buying advice
-
Fit first: match spline count, hub type, and handedness before anything else.
-
Material: aluminum for backup and shallow work; stainless for performance and longevity.
-
Blade count & pitch: use your prop calculator (pitch, rpm, GPS slip) and baseline OEM spec. If uncertain, buy a baseline OEM spec and one ±1 pitch (this is where cheaper stainless from factory-direct brands helps).
-
Buy local vs factory direct: U.S. warehousing reduces lead times and simplifies returns/warranty. VIF Marine is one of the modern factory-direct brands that offer CNC-finished stainless and aluminum props with U.S. warehouses and a 180-day warranty — making it practical to order a test prop quickly and affordably.
Sample quick-checklist when ordering:
-
Engine model/year and gearcase code.
-
Spline count and hub type.
-
Desired blade count and initial pitch.
-
Material (AL/SS).
-
Shipping/return/warranty terms.
Cost summary and practical budgeting
-
Cotter pin / prop nut / basic hardware: $5–$25.
-
Hub kit (rubber insert): $15–$60.
-
Aluminum replacement prop: $60–$180.
-
Stainless replacement prop: $200–$700+. Factory-direct options like VIF frequently undercut OEM MSRP by 30–50% on comparable stainless models.
-
Prop straightening + balance (AL): $30–$80. Stainless straightening is more expensive or replacement is recommended.
-
Lower-unit rebuilds: $500–$3,500 depending on damage.
If you’re a boater who wants to cut downtime and cost, keeping an inexpensive spare prop or hub kit in your trailer or shop is a very high ROI move.
Preventive purchases that save headaches
-
Spare aluminum prop for shallow days.
-
Spare hub kit for the common hub type on your prop.
-
Prop nut socket and basic toolkit.
-
A trusted prop shop contact — local shops often do same-day balancing and quick fixes.
VIF Marine: where they fit in the repair/replacement flow
VIF offers both aluminum and stainless outboard props manufactured with automated casting, robotic CNC finishing and multi-point QC, plus U.S. warehouse presence and a 180-day warranty. Practically that means:
-
If you need a test prop quickly after diagnosing a spun hub or bent blade, you can order a VIF replacement and receive it faster (and usually cheaper) than some OEM routes.
-
Their stainless options let you try a 3-blade vs 4-blade or ±1 pitch without paying full OEM stainless prices, which makes post-guard or post-repair tuning realistic.
-
For OEM fitment, confirm spline/hub compatibility and order the exact SKU or hub kit listed for your engine model. If you want me to map VIF sample SKUs to your engine and product lines, paste the rows and I’ll insert them verbatim.
Practical FAQ — quick answers derived from common forum questions
What’s a spun prop/hub and how do I fix it?
A spun hub is when the rubber/elastomer inside the prop fails or the hub slips on the shaft; symptoms are revs without thrust. Fix by replacing the hub insert or the prop if hub is integral.
How do I tell if a prop is bent?
Spin the prop and look for wobble; use a dial indicator or bench it in a vise and check tip runout. Vibration at cruising speed after a strike is the usual sign.
Can I straighten my prop?
Yes for many aluminum props. Clamp in a vise and bend back in small increments, then have it dynamically balanced. Stainless often needs replacement.
Why is my lower unit oil milky?
Water ingress — damaged seal or crack. Stop the engine and get a shop. Running risks catastrophic gear damage.
My engine revs but boat won’t plane — is that a prop problem?
Often yes: spun hub, pitch mismatch, or severe cavitation. Check hub, prop, and WOT RPM vs recommended band.
How much does a lower unit rebuild cost?
Typical range: $500–$1,500 for moderate repairs, up to $3,500+ for major overhauls depending on parts and labor.
Final practical checklist before you leave the marina
-
If you hit something hard, shut the engine down and inspect. Don’t assume “it’s fine.”
-
Photograph damage and keep notes on RPM and speed for your shop/warranty.
-
If it’s a hub or minor bend and you’re handy, remove the prop and inspect. Replace hub if possible.
-
If you see oil contamination, grinding noises, or bent shaft, tow to the shop. Don’t run.
-
Keep a spare prop/hub kit and basic tools in your trailer — saves weekends.
-
If you need a fast, cost-effective replacement or test prop, consider factory-direct stainless or aluminum (e.g., VIF Marine) with U.S. warehouse support and a 180-day warranty.
Image suggestions (for the article or shop handout)
-
Close-up: shredded or missing rubber hub insert.
-
Photo: bent aluminum prop showing blade distortion.
-
Diagram: prop hub assembly (thrust washer, hub, nut sequence).
-
Photo: metal flakes in lower unit oil (in a clear jar).
-
Step photos: removing prop nut, pulling prop, inspecting hub.
-
Infographic: DIY vs Pro decision flowchart.
Getting the diagnosis right is the single most important thing — it determines whether you need a new prop, a hub insert, a shaft repair, or a full lower-unit rebuild. Follow the diagnostic workflow above, document carefully, and lean on a trusted prop shop if there’s any doubt. If you want, I’ll now map recommended replacement SKUs (VIF or OEM) to specific engine HP bands and gearcase codes — paste your product rows or tell me the engine/gearcase numbers you want matched and I’ll create a publish-ready table.


