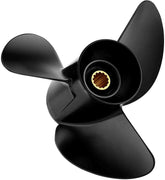
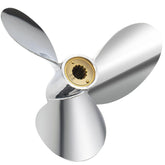
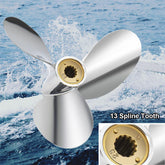
Propeller Maintenance Checklist
A well-maintained propeller keeps your boat safer, faster, and cheaper to run. This checklist walks you through the exact inspections, tools, and small repairs that stop a minor ding from turning into a blown lower unit or an expensive tow. It’s written for North American boaters who run outboards (Mercury, Yamaha, Honda, Suzuki, Volvo, Tohatsu and others), fleet managers, and anyone who wants fewer surprises on the water.
Below you’ll find a clear maintenance cadence, a step-by-step inspection routine, troubleshooting pointers (including how to spot a spun hub or excess slip), what spares to carry, how to store and winterize propellers, and a short field-test you can run after any swap. I also included links to our product pages and factory overview for quick parts or manufacturing background: Boat Propeller Online Store, propeller for Yamaha, propeller for MERCURY and How Boat Propellers Are Manufactured.
Quick summary — what this checklist achieves
-
Prevents propulsion failures caused by damaged blades, worn hubs or shaft grooves.
-
Keeps your outboard in the engine maker’s WOT band (better fuel economy, longer life).
-
Reduces downtime by having the right spares and a repeatable field-test routine.
-
Lowers repair cost by catching damage early and using correct repair steps.
Tools and spares every boater should have onboard
Hand tools
-
1/2" and 9/16" open-end or socket set (prop nuts vary by engine).
-
Torque wrench set to the prop nut spec for your engine family.
-
A small file and emery cloth for light burr removal.
-
Prop puller (for stubborn props).
-
Wire snips and small pliers for removing fishing line.
Inspection & measuring tools
-
Flashlight and magnifying loupe.
-
Dial caliper (measures shaft diameter and blade thickness).
-
Digital tachometer or reliable tach on the dash.
-
GPS (for speed) or a handheld GPS app for slip calculations.
Spare parts to carry
-
One spare aluminum prop (universal emergency fit or a specific spare for your engine).
-
Spare prop nut, washer, and cotter pin for your engine model.
-
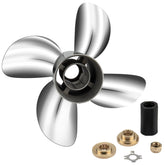
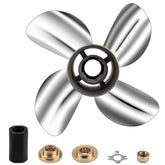
Spare hub insert(s) if your prop uses an elastomer hub.
-
Small tube of marine-grade anti-seize and a dab of anti-seize compound for prop nut threads.
-
Replacement zinc anode if your prop uses one.
Inspection cadence — how often to check
-
Every outing (quick visual): Examine blade tips, check for fishing line, and confirm prop nut is secure.
-
Monthly (active season): Remove the prop; inspect shaft, splines, hub insert and skeg. Clean shaft and re-lubricate.
-
Before long trips or after grounding: Full inspection and field test (see below).
-
Annual service: Professional inspection for blade straightness, hub condition and cup/ rake checks; consider shop repair for stainless props if damaged.
Pre-launch quick check (do this every time)
-
Visually inspect blades for fresh nicks or bent tips. Rotate the prop slowly and look for wobble.
-
Check for fishing line wrapped around the shaft or hub housing. If present, cut and remove it — it will quickly chafe seals.
-
Verify the prop nut is tight and the cotter pin (or lock tab) is seated.
-
Confirm there are no loose anodes or shredded elastomer from the hub.
-
Give the blades a gentle feel — any soft or mushy feeling at the root indicates a damaged hub insert.
If anything looks wrong, don’t run at high RPM — swap to a spare and inspect more closely.
Full remove-and-inspect routine (monthly or after impact)
Step 1 — Remove prop safely
-
Shift into neutral and prop the boat off trailer / open water per manufacturer recommendations. Use the right socket size for your prop nut.
-
Keep a rag handy — a little oil or grease on the nut helps avoid stripped threads.
Step 2 — Clean and document
-
Wipe the shaft and splines clear of grease, fishing line, and debris.
-
Photograph the prop front/back and the shaft for later comparison (useful if you submit a warranty claim).
Step 3 — Inspect the shaft and splines
-
Look for grooves, sharp nicks or flattening. Grooves can cut seal lips and cause water intrusion. If you see deep scoring, plan for shaft repair/replacement before reinstalling a prop.
-
Measure shaft diameter at two points — consistent diameter confirms no taper wear.
Step 4 — Inspect hub and insert
-
If your prop has an elastomer insert (spun hub protection), check for cracking, hardening, or displacement. A spun hub occurs when the elastomer tears and the prop spins relative to the hub, causing sudden loss of top-end. Replace the insert at the first sign of wear.
Step 5 — Inspect blades and cup
-
Look for cupping (edges rolled back), dents, bends, or corrosion pitting. Small nicks can be dressed; large deformations require shop repair or replacement.
-
Check blade rake and balance visually — uneven rake or visible bend likely means the blade is compromised.
Step 6 — Check anodes and threads
-
Replace sacrificial zincs if more than 50% depleted.
-
Examine prop nut threads and keyway/washers for deformation.
Re-installation and torque procedure
-
Lightly coat the prop shaft with marine grease or anti-seize per engine maker specs. Do not over-apply; excess grease can migrate to seals.
-
Slide the prop straight and cleanly onto the shaft — don’t force a misaligned spline.
-
Thread the nut and torque to manufacturer spec. Many outboard prop nuts are 45–55 ft-lbs but always follow your engine manual. Over-torquing risks thread damage; under-torquing risks losing the prop.
-
Install cotter pin or lock tab as required. Cut and bend the cotter pin correctly to prevent loosening.
Field troubleshooting — what the symptoms mean
Symptom: sudden loss of top speed and power, RPM looks normal
Possible cause: spun hub (elastomer insert failure). Check for slippage between prop and hub; replace insert or the entire hub assembly.
Symptom: vibration that increases with RPM
Possible causes: bent blade, unbalanced prop, damaged hub, or shaft run-out. Remove prop and spin shaft by hand to detect wobble. If vibration persists after swapping props, schedule lower unit service.
Symptom: engine overheats after prop swap or pitch change
Possible causes: prop pitch too high (engine lugging) or blockage in cooling. Verify WOT RPM is in the recommended band; check for waterflow at the tell-tale and intake.
Symptom: oil in gearcase or water in lower unit
Possible causes: leaking seals caused by fishing line grooves or impact. Remove lower unit for seal inspection. Don’t run the engine until fixed.
Quick field test (post-service or after a prop change)
-
Load boat to normal cruising condition (fuel, passengers, gear).
-
Run to wide-open throttle in calm water; record WOT RPM and GPS top speed.
-
Cruise at normal throttle; record cruise RPM and GPS speed.
-
Calculate theoretical speed and slip using:
Theoretical Speed (mph) = (RPM × Pitch in inches) ÷ 1056
Slip = (Theoretical Speed − Measured Speed) ÷ Theoretical Speed
-
Compare WOT RPM to engine manufacturer’s WOT band. If RPM is above recommended range → pitch too low (raise pitch). If RPM is below → pitch too high (lower pitch). Aim to be in the recommended WOT band under normal load.
This field test will reveal hub slippage and whether the pitch/size choice was appropriate.
Damage repair basics — what you can do vs what you must send to a shop
DIY repairs you can safely do
-
File small burrs on blade tips and edges. Smooth, consistent edges reduce cavitation and noise.
-
Remove fishing line and lightly sand small nicks.
-
Replace a worn elastomer insert if you carry the correct replacement kit and follow the engine maker’s instructions.
Repairs that require a shop
-
Straightening stainless steel blades (precision machine work required).
-
Repairing deep groove damage to shafts or keys.
-
Welding or rebuilding severely cupped or cracked blades.
-
Replacing a worn gearcase seal set (this is a lower-unit job).
If you run in saltwater or rocky lakes regularly, establish a relationship with a prop shop that can do press fits and dynamic balancing.
Guarding, safety and propeller protectors
Prop guards, rings and baskets are designed to help prevent entanglement and minimize the risk of injury or hull damage. For shallow, debris-prone lakes or rental fleets, a prop guard can reduce maintenance costs and the number of prop strikes — at the cost of a small increase in drag and a modest reduction in top speed. Evaluate based on mission: personal boating vs commercial or rental service.
Storage, transport and winterization
-
Dry and clean: After the season, remove marine growth and rinse with fresh water. Remove prop and dry before storage.
-
Coating: Lightly coat the shaft with corrosion-resistant grease or anti-seize before storing for prolonged periods.
-
Wrap and protect: Wrap props in soft material to prevent blades rubbing together during transport.
-
Off-season inspection: Before winter storage, remove and inspect for damage, replace worn hubs, and store in a dry, temperature-stable place.
For jet skis and PWCs, follow PWC-specific winterization guidance for impellers and cooling systems in addition to prop checks.
When to upgrade: aluminum vs stainless and blade count choices
-
Swap to stainless steel if you consistently run at high RPM, need tighter top-speed control, or operate commercially where downtime costs are high.
-
Keep an aluminum spare for field swaps — cheaper and easier to repair.
-
If you need better hole-shot and low-speed control (towing, loaded pontoons), consider a 4-blade propeller; for top speed and cruise economy, a 3-blade remains the most efficient.
If you want to review size and material options by engine brand, browse our collections: propeller for Yamaha, propeller for Suzuki, propeller for Honda, propeller for Volvo and propeller for Tohatsu. Our online store lists compatible hub variants and spare kits to simplify procurement: Boat Propeller Online Store.
Fleet and rental operator checklist (practical additions)
-
Log every prop event (strike, repair, replacement) in a simple database: engine serial, prop SKU, date, damage type, repair action.
-
Standardize on 1–2 spare prop models per engine family for quick replacements.
-
Train staff to remove fishing line properly and to inspect shafts monthly. Line damage is the single most common cause of seal failure.
-
Keep a vendor-mapped kit of hub inserts by engine family for quick fixes — a spare hub insert reduces downtime dramatically.
Safety reminders
-
Never work under a propeller while the engine is running or the boat is in gear.
-
Ensure the engine is at rest and ignition is disabled before removing a prop.
-
If you smell gearcase oil or see water in the gear oil, stop operation and send the lower unit for service. Running with compromised seals risks catastrophic lower-unit failure.
Final quick checklist — copy this into your pre-launch routine
-
Visual blade check for nicks, bends or cupping.
-
Fishing line removed and shaft cleaned.
-
Prop nut tight and cotter pin or lock installed.
-
Spare aluminum prop + hub insert present onboard.
-
GPS & tach working for post-swap field test.
-
Annual shop inspection scheduled (if heavy use).
If you want guided parts matching or spare-kits for specific engines (Mercury, Yamaha, Honda, Suzuki, Volvo, Tohatsu), our factory and catalog pages will help: boat propeller manufacturer and How Boat Propellers Are Manufactured. For direct purchasing, browse Boat Propeller Online Store and our hot-selling propellers to quickly add spares to your cart.


