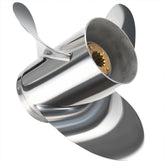
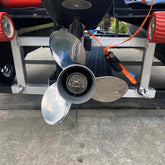
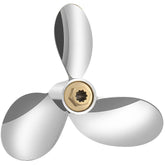
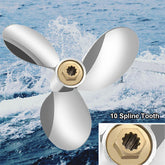
How to Remove Propeller from Mercury Outboard Motor
Let me tell you something I've learned after years of working on boats: keeping your Mercury outboard motor's propeller in top shape is key. I've lost count of how many boaters I've seen stranded because they neglected this simple maintenance task. Over the course of numerous repairs and weekend projects, I have devised a foolproof method for removing and replacing outboard propellers that I'm going to share with you.

Tools You Will Need to Remove the Propeller
Trust me, having the right tools makes all the difference. Over the years, I've learned that preparation is half the battle. Here's what you'll want to have on hand:
Wrench Set
Your best friend for those stubborn nuts. I've got an old set that's seen me through hundreds of repairs.
Socket Set
Some Mercury motors can be particular about socket sizes. Always be prepared.
Propeller Puller Tool
A lifesaver when things get tricky. I learned this the hard way after struggling with stuck propellers early in my career.
Pliers
Perfect for those small cotter pins that love to give you trouble.
Lubricant
A little grease goes a long way in making removal smoother.
Clean Rag
You'd be surprised how much grime can accumulate around a propeller.
Rubber Mallet
Gentle tapping can work wonders – just don't get too enthusiastic.
Gloves and Safety Glasses
Protection isn't optional. I've got the scars to prove why.
Why You Need to Replace the Outboard Propeller
I've seen propellers in all states of disrepair, and let me tell you, knowing when to replace is an art form. Here are the red flags I always look out for:
Damage or Cracks
Hitting a sandbar or rock can do more damage than you might think. Those tiny cracks? They're trouble waiting to happen.
Efficiency Loss
If your boat suddenly feels sluggish or starts drinking more fuel, your propeller might be crying out for help.
Improper Size
Not all propellers are created equal. The wrong size can turn your smooth ride into a frustrating experience.
Corrosion
Saltwater is beautiful but brutal. If you're not maintaining your prop, corrosion will be your worst enemy.
Performance Upgrades
Sometimes, you just want a little extra kick. Upgrading can make a world of difference.
Steps for Removing the Outboard Motor Propeller
Here's where the real work begins. I'll walk you through this process step by step, just like I'd guide a rookie mechanic.
Turn Off the Engine and Disconnect the Battery
Safety first – always. I can't stress this enough. No shortcuts here.
Lift the Outboard Motor
Get yourself some working room. A stable, raised motor makes everything easier and safer.
Secure the Propeller

Pro tip: Use a propeller lock or a piece of wood to keep things steady. Trust me, you don't want unexpected movement while working.
Locate the Propeller Nut
This is where your wrench set comes into play. Loosen that nut carefully – counterclockwise is your friend.
Remove the Cotter Pin

Grab those pliers and gently remove the pin. It's holding things in place, so treat it with respect.
Loosen the Propeller
Stuck? Don't panic. A bit of lubricant and some gentle taps with a rubber mallet usually do the trick. Patience is key.
Remove the Propeller

Carefully pull it off. If it's being stubborn, that propeller puller tool will be your salvation.
Inspect the Propeller Shaft
Take a moment to check for any wear or damage. A clean shaft is a happy shaft.
Installing the New Outboard Propeller
Now for the fun part – getting that new propeller in place.
Clean the Motor Shaft
Start with a clean slate. Remove any old grease or debris. Your new propeller will thank you.
Align the Propeller
Take your time here. Proper alignment prevents a world of headaches later.
Install the Propeller
Slide it on smoothly. If it doesn't fit, don't force it – something's not right.
Tighten the Propeller Nut
Snug is good, but don't go hulk mode. Over-tightening can cause as much trouble as leaving it loose.
Install the Cotter Pin
Secure that pin. Bend the ends to keep it in place.
Test the Propeller
Lower the motor and start her up. Listen carefully. Any weird noises? Something might need adjusting.
Conclusion
Well, it is not rocket science to maintain an outboard motor, but it does call for utmost care and attention. I have been doing this since time immemorial, and let me tell you-a well-maintained propeller is equal to a great, enjoyable boating experience. Take your time and go step by step, and you shall be fine.
Keep in mind that every boat has a story, and the next chapter depends on you. Happy boating!


